Just wanted to say a quick THANK YOU to all my Pinterest followers. Simple is Pretty now has 100 followers! Check out my Pinterest boards, here.
Be sure to check out my FREE Printables boards including great Halloween and Thanksgiving printables for decorating and keeping you organized! I’m always adding pins so be sure to keep checking in.
Follow me on Pinterest!
Thanks,
As Always,
Sandra
Tuesday, October 30, 2012
Monday, October 29, 2012
DIY Refill for Lysol No Touch Hand Soap Dispenser
So love the Lysol No Touch Hand Soap dispenser… but hate the cost of refills.
The dispenser works well with kids. All you need to do is place your hand under it and the soap automatically dispenses. We have a Lysol soap dispenser in the bathroom and kitchen. We use a lot of soap in our house so I needed a less expensive alternative than the costly refills.
I knew there had to be a better way to refill the Lysol containers besides trying to pop the lid off the refill container with a table knife. I was always scared of breaking the lid, not to mention, I found this very tricky to do.
Here is my EASY solution…
The Lysol refills cost about $5 each, but my DIY solution costs much, MUCH LESS.
Here is what you need:
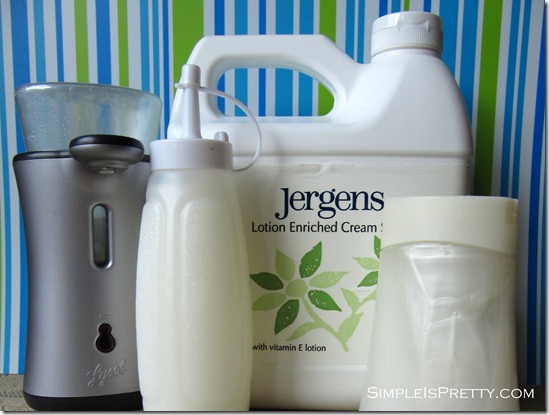
1) Soap to refill container – I use Jergens Lotion Enriched Cream Soap 2L purchased from Superstore. The soap is not really thick so it works well in the Lysol soap dispenser. But any soap that is not too thick will work.
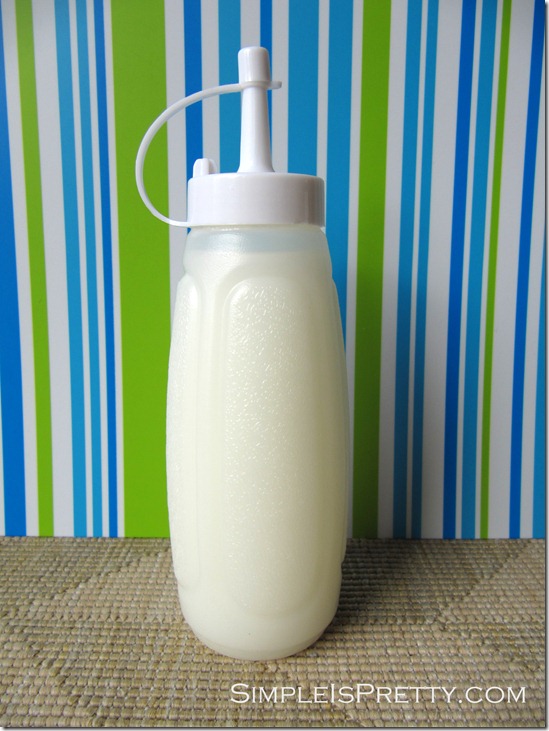
2) Ketchup/Mustard Squeezable container – I bought mine from the dollar store. They usually are found in packs of 2.
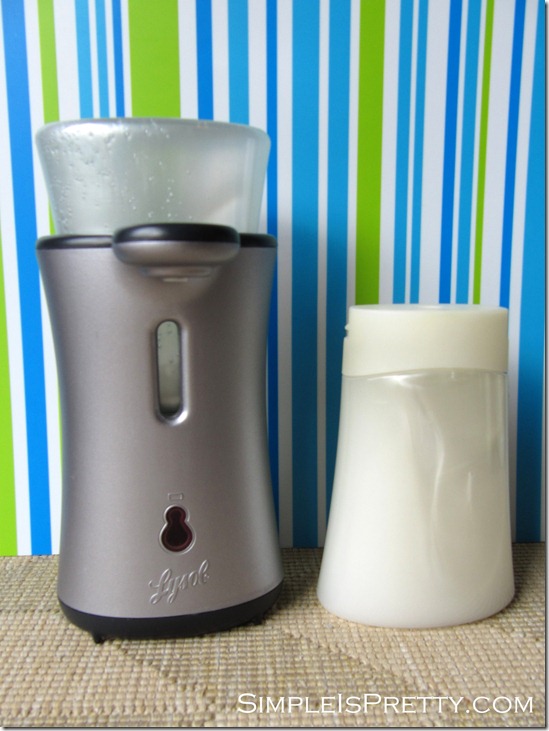
3) Lysol No Touch Hand Soap Dispenser – When you buy it from the store it comes with 1 refill container.
What you need to do:
1) You’ll need to adapt your squeezable container to fit the Lysol refill container…
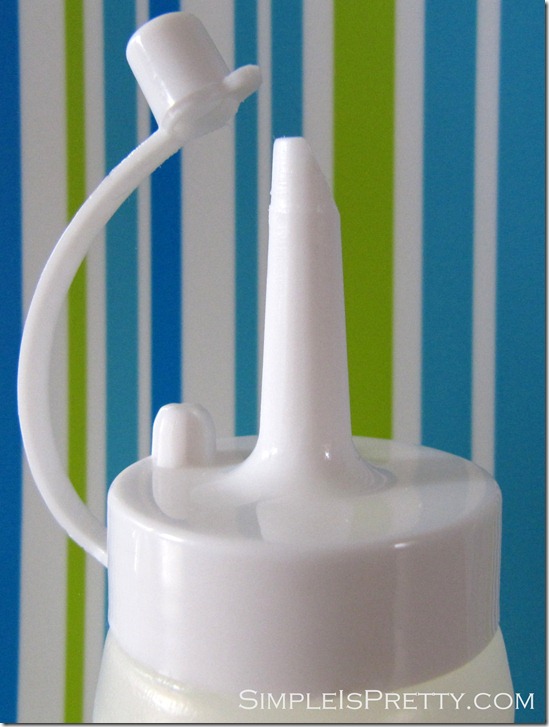
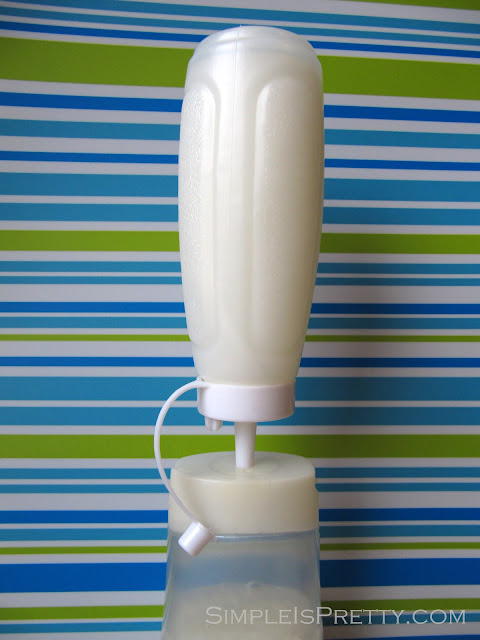
You will need to cut the end of the squeezable container on a slant so the soap can be squeezed into the refill bottle. The end of the squeezable container will need to fit into the top of the refill bottle so you may need to scrape or shave off some of the plastic carefully with a knife to make the end smaller.
2) Add soap to your squeezable container.
3) Fill your Lysol refill with your squeezable container. Simply place your squeezable container into the hole on the top of the Lysol refill and squeeze in the soap.
My squeezable container can fit as much soap as it takes to fill one Lysol refill container. So much cheaper than buying the refills from the store. Especially, since we are getting into the cold and flu season and we are always washing our hands!
What are your soap solutions? What soaps do you use? How do you try to keep costs down?
As Always,
Sandra


Labels:
Bathroom,
Cleaning,
DIY,
Kitchen,
Soap Refill
Monday, October 22, 2012
Blog Planner
One area of my life I knew I needed to organize is this blog. I want to be a more organized blogger, since this blog is mostly about… you guessed it… organizing!
I’m the kind of person who likes to use paper lists. I love the feeling of checking off a project on a “To Do” list. I feel like I’m getting somewhere and I’m actually completing something.
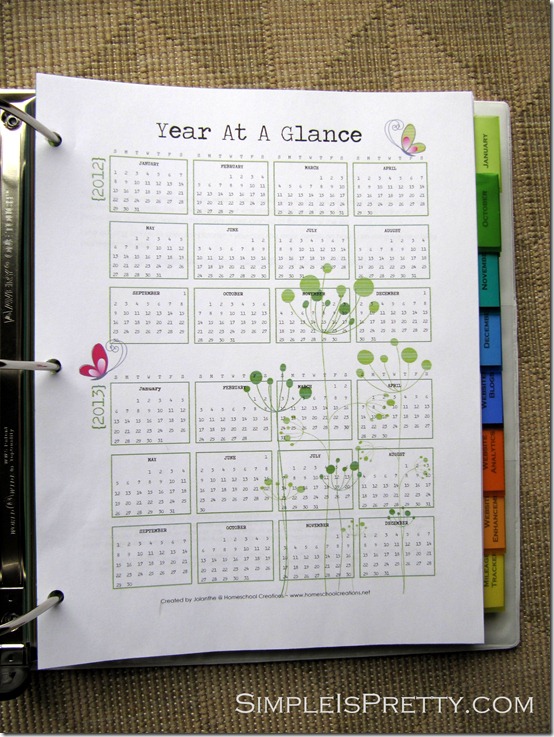
I’ve toyed with the idea of creating my own blog planner printable. I was unsure how to put it together and what areas I needed to include. So I took to the internet to see what other are using. I came across this great FREE blog planner from Jolanthe at Homeschool Creations.
Jolanthe’s blog planner includes (as listed from her website):
Here is how I put my Blog Planning Binder together…
1. First grab a binder. I used a 2” Avery Heavy Duty Robuste white binder. I opted for a 2” binder so I can store all my blog ideas in one place. But a 1” binder will also do the trick. The Avery Heavy Duty Robuste binder also has enough room so the dividers won’t stick out and get wrecked.
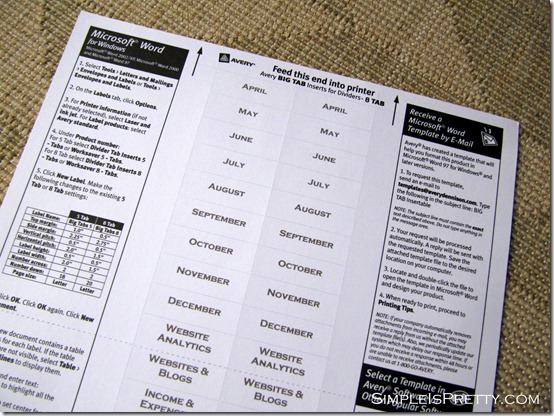
2. Next, I added 3 packages of dividers. I love the pop of color and decided to add Avery Big Tab Insertable Plastic Dividers (8 Tab). In the end, I have 24 different sections to my binder.
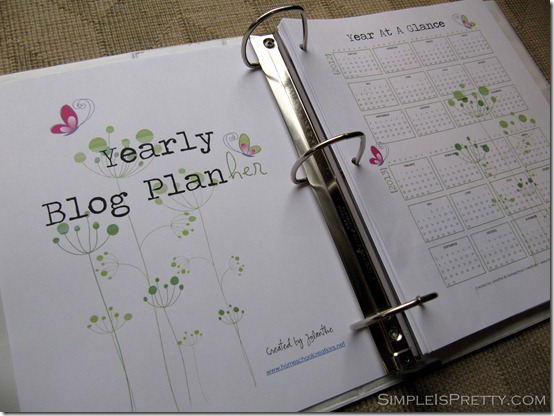
3. Print out Jolanthe’s Pretty Blog Planner here. Next, hole punch the printable blog planner to fit in the binder.
4. Print out the divider labels using the instructions on the package.
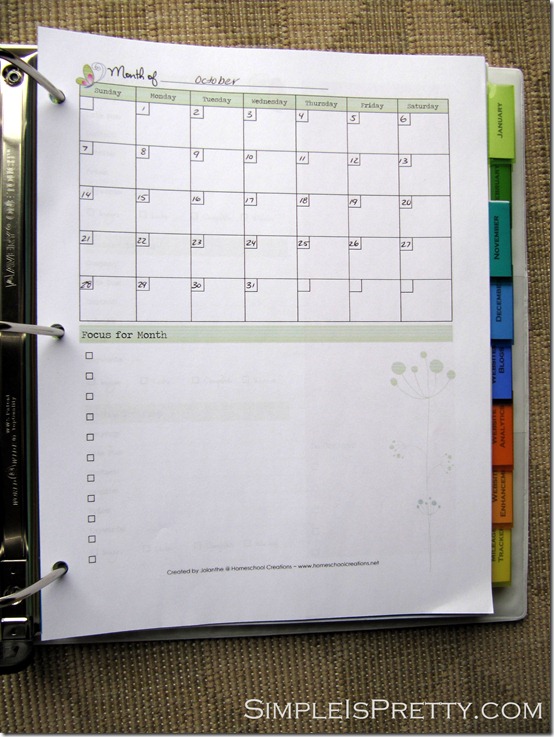
I have a divider for each month of the year. The section for each month includes Jolanthe’s monthly calendar page, review/giveaway & notes page and weekly schedule page.
The other sections (dividers) in my binder include:
5. To customize my binder I added some scrapbook paper to the front plastic cover. I just trimmed the paper to the right size and slid it underneath the title page Jolanthe created.
I printed a duplicate copy of the cover page and cut it down to fit the spine of the binder. I also lined the spine and back cover with the same patterned scrapbook paper as the front cover.
Here is how it turned out…
How do you organize your blog? Do you prefer to have something paper to refer to and check off? Or do you use a program on your phone, iPad or computer?
As Always,
Sandra
UPDATE: Now updated with 2014/2015 calenders.
I’m the kind of person who likes to use paper lists. I love the feeling of checking off a project on a “To Do” list. I feel like I’m getting somewhere and I’m actually completing something.
I’ve toyed with the idea of creating my own blog planner printable. I was unsure how to put it together and what areas I needed to include. So I took to the internet to see what other are using. I came across this great FREE blog planner from Jolanthe at Homeschool Creations.
Jolanthe’s blog planner includes (as listed from her website):
- 12 month-at-a-glance pages with a monthly focus list
- room to track reviews and giveaways
- space to jot notes and ideas
- weekly post trackers, including social media reminders
- monthly website analytics tracker: RSS, Facebook, Twitter, etc…
- a place to keep track of affiliate program info
- a Twitter hashtag tracker {because there are lots!}
- weekly blog meme tracker
- mileage sheet {who thought blogging might involve driving?}
- website username & password sheet {I can’t remember them all!}
- and room to jot down all those wonderful post ideas
Here is how I put my Blog Planning Binder together…
1. First grab a binder. I used a 2” Avery Heavy Duty Robuste white binder. I opted for a 2” binder so I can store all my blog ideas in one place. But a 1” binder will also do the trick. The Avery Heavy Duty Robuste binder also has enough room so the dividers won’t stick out and get wrecked.
2. Next, I added 3 packages of dividers. I love the pop of color and decided to add Avery Big Tab Insertable Plastic Dividers (8 Tab). In the end, I have 24 different sections to my binder.
3. Print out Jolanthe’s Pretty Blog Planner here. Next, hole punch the printable blog planner to fit in the binder.
4. Print out the divider labels using the instructions on the package.
I have a divider for each month of the year. The section for each month includes Jolanthe’s monthly calendar page, review/giveaway & notes page and weekly schedule page.
The other sections (dividers) in my binder include:
- Websites & Blogs – includes Jolanthe’s “Website & Blogs” & “Link-ups to Participate” page
- Website Analytics – includes Jolanthe’s “Website Analytics” page
- Website Enhancements
- Mileage Tracker – includes Jolanthe’s “Milage Tracker” page
- Income & Expenses – includes Jolanthe’s “Income and Expense” & “Affiliate Programs” page
- Shopping Ideas & Wish List
- Home Project Ideas – includes Jolanthe’s “Ideas in my head…” page
- Twitter – includes Jolanthe’s “Twitter Hashtag Tracker” page
- Blog Post Ideas – includes Jolanthe’s “Ideas in my head…” page
5. To customize my binder I added some scrapbook paper to the front plastic cover. I just trimmed the paper to the right size and slid it underneath the title page Jolanthe created.
I printed a duplicate copy of the cover page and cut it down to fit the spine of the binder. I also lined the spine and back cover with the same patterned scrapbook paper as the front cover.
Here is how it turned out…
How do you organize your blog? Do you prefer to have something paper to refer to and check off? Or do you use a program on your phone, iPad or computer?
As Always,
Sandra
UPDATE: Now updated with 2014/2015 calenders.
Labels:
Blog Planner,
Labeling,
Paper,
Planning,
Printables,
Scheduling
Thursday, October 11, 2012
Simple is Pretty Link Party
The first ever Simple is Pretty Link Party starts today!
Link up your Simple and Pretty spaces and ideas. You can link anything from decorating a room in your house, to organizing a kitchen pantry, to making a delicious and simple recipe! Share your ideas and inspiration by linking up.
Don't forget to visit the Free Printables page to link up your free printables as well!
Thanks! And I can't wait to see your links!
As Always,
Sandra
Link up your Simple and Pretty spaces and ideas. You can link anything from decorating a room in your house, to organizing a kitchen pantry, to making a delicious and simple recipe! Share your ideas and inspiration by linking up.
Don't forget to visit the Free Printables page to link up your free printables as well!
Thanks! And I can't wait to see your links!
Sandra
Labels:
Link Party
Wednesday, October 10, 2012
Free Printables Link Party
Now YOU can share your FREE Printables on Simple is Pretty! Visit the FREE Printables page and Link up your free printables! Link up anything from grocery lists, to calendars, to holiday printables and more.
Link your FREE Printables here!...
As Always,
Sandra
Link your FREE Printables here!...
As Always,
Sandra
Labels:
Link Party,
Printables
Friday, October 5, 2012
Kid's Activity and Craft Area Upstairs
The last few days, I've made some changes upstairs. I've been moving furniture and placing items in different areas. One new area I've created is a kid's activity and craft area on our main level.
Normally, the kids would color, play cards and make a mess on the kitchen table.
I needed a new solution because it was such a pain! We would have to clean up their books and crayons for meals and snacks multiple times a day. Since the table is large, crayons would roll across the table and soon the boys would be chasing them and crawling all over the table. I also have my laptop on the kitchen table so it got a little crowded.
I wanted an area that the kids could access when they want and push their own chairs in. Currently, when they want to color (which is about 10 different times a day!) I have to push their chairs in for them. HUGE pain!
The newly created activity space is by our back door. We hardly use this door, especially in winter.
If we need to get outside, we usually use the patio door that is a few footsteps away instead. So far this space is working well. I can see them and keep an eye on them from the living room and the kitchen.
I used 2 IKEA tables we have had for years. The kids were using these white tables downstairs with their kitchen set. They are triangles and are the perfect size for them. A separate table for each boy is working well. Fights are reduced since they each have their own space to play.
These chairs are the right height, inexpensive, and don't match. Every time I walk by the chairs, I giggle inside because they look so odd to me. Maybe no one else notices how they don't match, but it definitely bugs me!
Each boy has a basket of things to do. My youngest has washable crayons, coloring books and a set of picture cards. My oldest has crayons, dry erase crayons (the dry erase crayons are great, they don't dry out!), coloring books, stickers, and card games.
Things to Improve/Change:
1. Get matching chairs - not only are the chairs different colors, they are also different sizes.
2. Curtain - this small window can let in a lot of light since it faces west. A curtain will help my oldest boy see his coloring book easier, and stop the blinding sunlight.
So far I'm loving this new space. I'm saving time and my sanity because their mess is now contained to an area and not all over my kitchen table!
As Always,
Sandra
Subscribe to:
Posts (Atom)


