Friday, October 10, 2014

Behind the Scenes: Shop Studio

I’ve wanted to do a post about my Etsy shop studio for a long time now.  After finally taking photos of the space, here it is!  My studio is always a work in progress because I am continually adding stock to my Etsy shop and need to move things around to get the best fit.

Here is a tour of my studio…

My Etsy Shop Studio
One of my favorite things about my studio is the space gets lots of natural light.  Working in natural light makes it enjoyable and easier to work.  My office in the old house was in the basement and I’m so thankful that in this house we had space available above ground for my studio area.

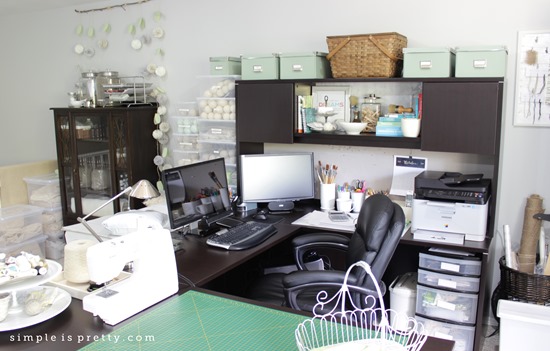
Simple is Pretty Shop Studio

Simple is Pretty Shop Studio Desk
My studio functions as my home office, sewing room, paint studio, shop stock room, inspiration and creating area.
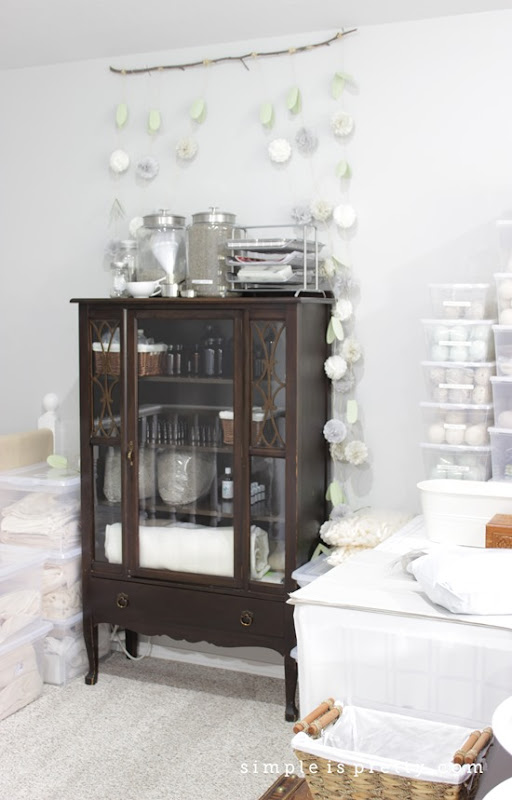
Simple is Pretty Shop Studio China Cabinet
I use my grandmother’s old china cabinet to hold essential oils.
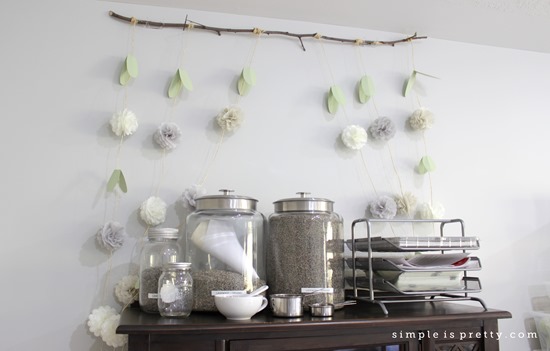
Simple is Pretty Shop Studio Lavender
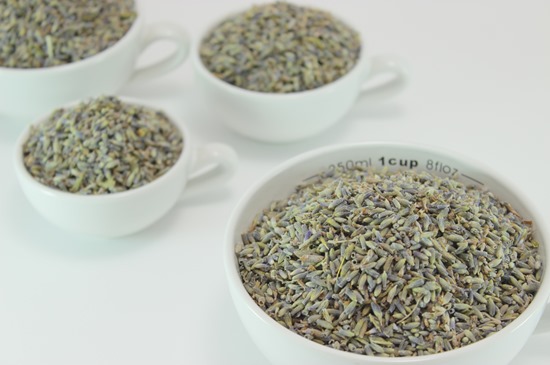
On top of the cabinet, I keep my lavender in sealed glass jars to preserve the freshness.  I use lavender in sachets and I sell it by the pound in my shop.
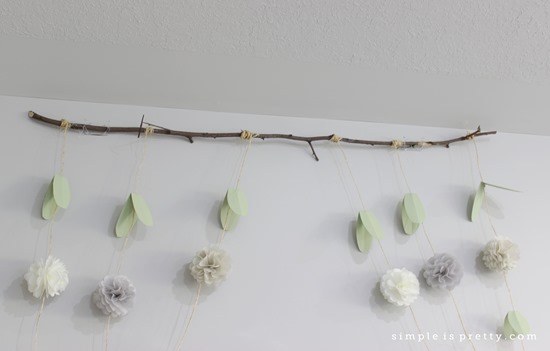
Simple is Pretty Shop Studio Pom Pom Vines
Hanging above the china cabinet, I have my paper pom pom vines.  Sarah from Paperwhite Designs created them for me, and I LOVE them!  I originally got the vines to help decorate my table for my next craft show, so until then I have hung them above the cabinet until they are needed.  I love the colors she suggested, thanks Sarah!
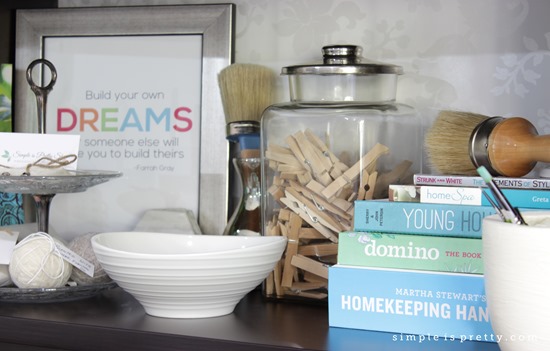
Simple is Pretty Shop Studio Shelf Styling
I used gift wrap to line the back of the cabinet to brighten it up a bit.  I used the same process I used in the kitchen.
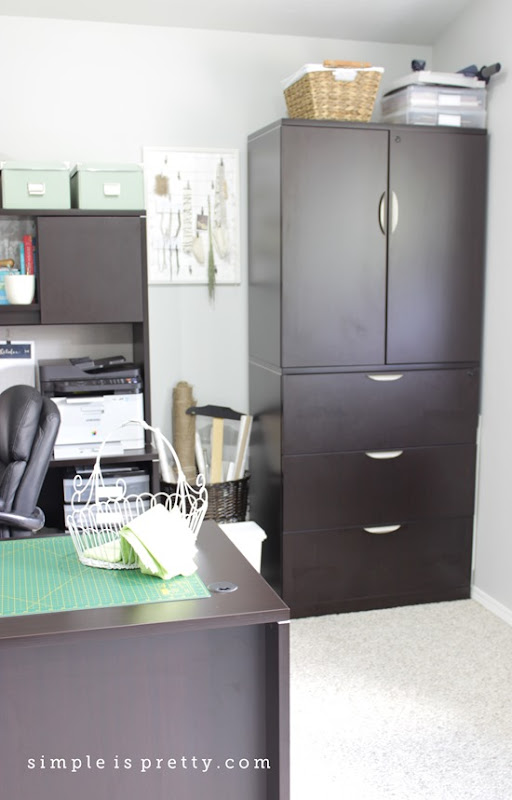
Simple is Pretty Shop Studio Inspiration Board
My inspiration board is in between the storage/filing cabinet and the desk.  I recovered the tack board on the desk with drop cloth earlier this year.
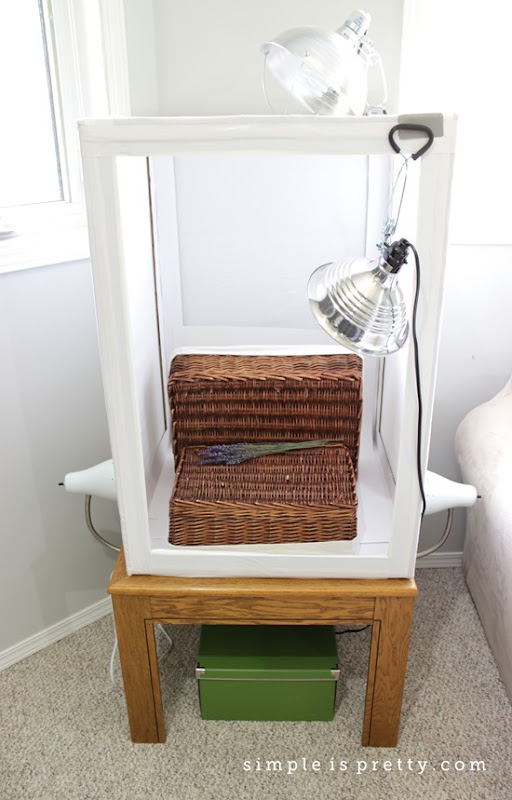
Simple is Pretty Shop Studio Light Box
Here is my light box and I use it photo shoots for my shop and blog.  To make your own light box, check out my tutorial here.
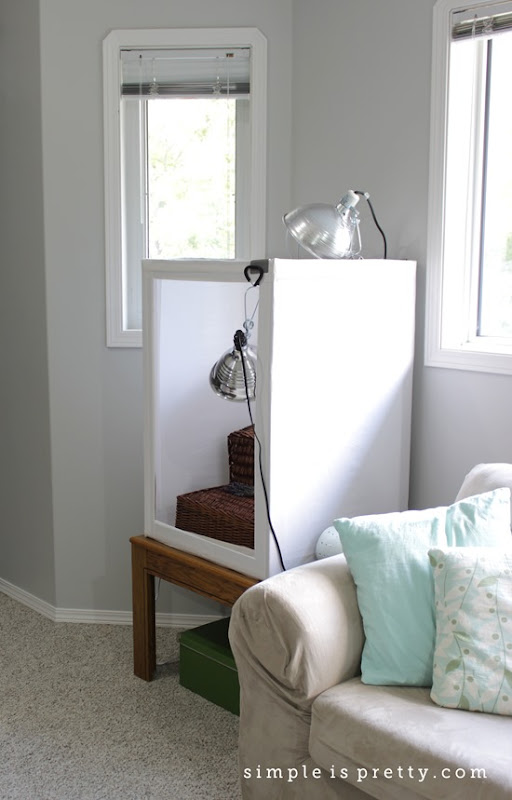
Simple is Pretty Shop Studio Light Box Setup

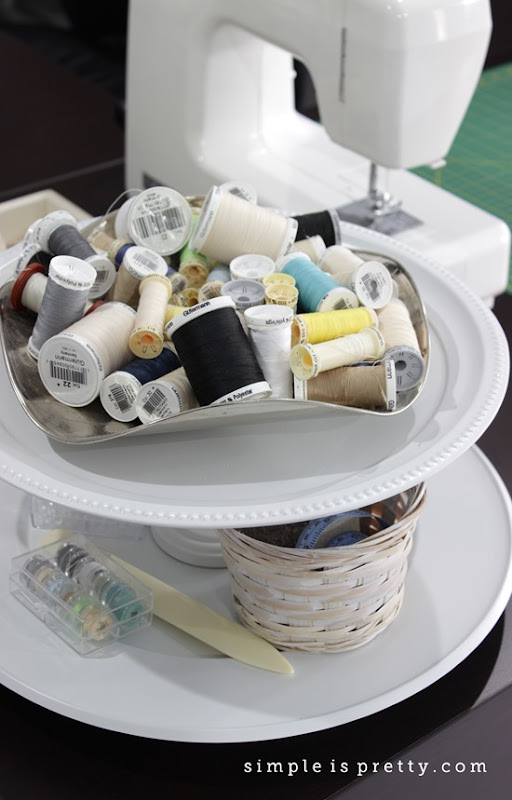
Simple is Pretty Shop Studio Serving Tray Tower
I use my DIY serving tray tower to hold my thread and other sewing items.
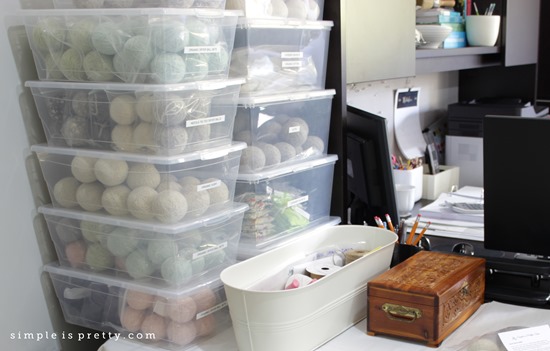
Simple is Pretty Shop Studio Packing Area
Don’t get me wrong.  My studio is not always this neat and tidy.  I admit I picked up and dusted to take these photos.  But I do find that I work better in a clean and organized environment and this photo shoot gave me a push to take a look at my space in a new light.

I find it easier to snap some pics and then take a look and see what is looking “off” in a space.  Photos don’t lie and if you are looking to restyle a room I always find that taking a few pics and then analyzing them helps to find out what is working for a room visually and what is not.  Don’t be afraid to move things around in a room.  If the item is not working in its new home, you can always move it back.

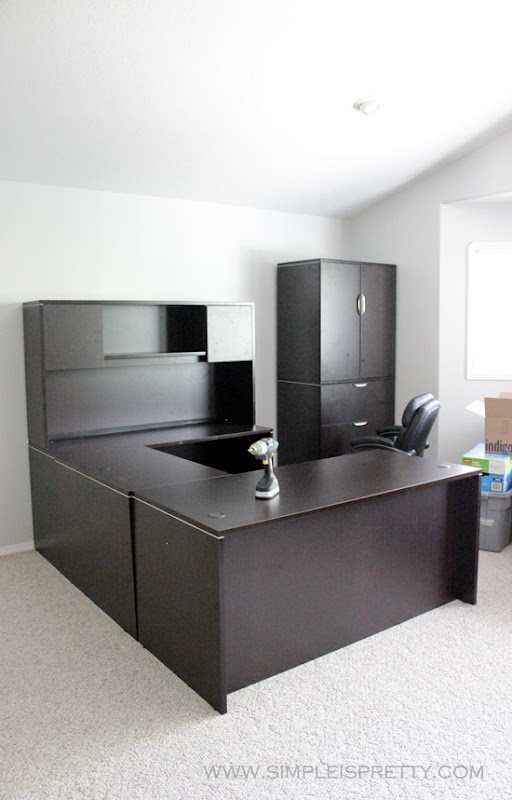
Here is what the studio looked like shortly after we moved in:
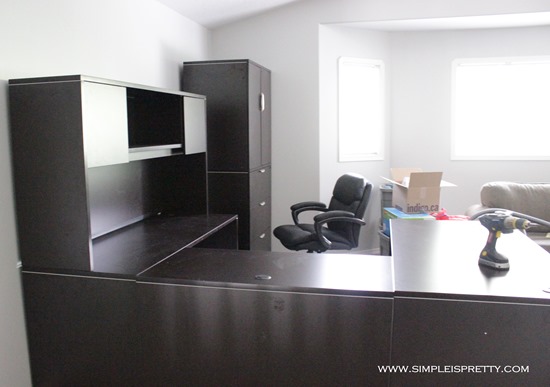
Simple is Pretty Shop Studio Before Photo

Simple is Pretty Shop Studio Before Photo
After a year of living with our new office furniture, I love how the space turned out.
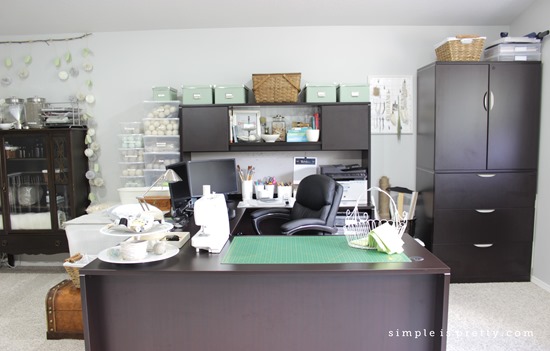
Simple is Pretty Shop Studio After Photo
Sandra

Friday, September 12, 2014

Lavender Essential Oil is Available in the Shop!

100% Pure Lavender Essential Oil from Simple is Pretty Shop


Today, I’m introducing my new line of essential oils!  Currently, I have 4 sizes of 100% pure lavender essential oil from France available.  I hope to have new scents available in the coming weeks, be sure to check back!


You can use essential oil to scent your wool dryer balls.  Lavender has a relaxing and calming aroma, perfect for laundry use!  I use lavender essential oil on my wool dryer balls and I usually rescent my dryer balls every couple of weeks.  A 10 ml bottle holds approximately 200 drops of essential oil.  Therefore, if you have 4 dryer balls and rescent using 2 drops per ball, you will have enough essential oil to rescent your dryer balls 25 times.  If you rescent them every 2 weeks, your bottle will last you almost a whole year!  So much cheaper than expensive dryer sheets and NO harsh chemicals!

You can also use my essential oils in homemade cleaning recipes, laundry detergents, and soaps.  CANADIAN ORDERS - No customs or duties charges to worry about because my shop is in Canada!


Here are a few essential oil safety tips:

Most essential oils should not be used undiluted or “neat” directly on the skin. Unless you know it is safe to use undiluted, you should dilute essential oils with a carrier oil, such as avocado, grapeseed, or sweet almond. To test if you are sensitive to a essential oil, add 1 or 2 drops to a teaspoon of carrier oil in a small container and mix to combine. Test by placing a dab of the mixture on your wrist or the inside of your elbow and wait for 24 hours.

If you are pregnant or suffering from any medical condition, consult a health practitioner before use.  Keep essential oils out of reach of children and pets.

To check out my essential oil collection, visit my Etsy shop –> www.simpleisprettyshop.etsy.com.  For $5 off your purchase, be sure to use the coupon code "SUMMER2014", expires September 23, 2014.

Sandra


Saturday, September 6, 2014

A little bit of lock picking…

So I just finished picking my first lock.  Who knew I had it in me?  Who knew this little thing would cause so much trouble?

A little bit of lock picking

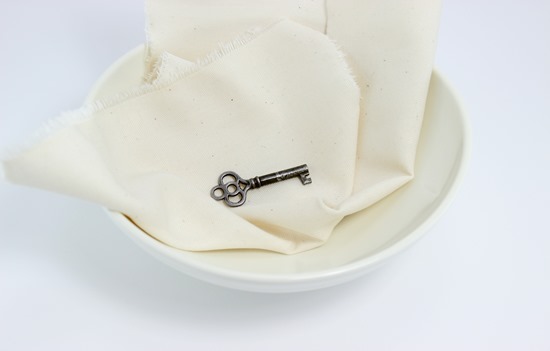
Today, I got the unexpected opportunity to break into the china cabinet I had acquired from my aunt a few months ago.  The ordeal all started an hour ago when I decided to lock the door with its skeleton key.  This was the first time I tried locking the lock.  So instead of trying locking the lock with the china cabinet empty, my first try was after I had put in my new essential oil bottles and some new wool to create dryer balls.  Panic mode set in after I discovered the lock wasn’t working when I tried to unlock the cabinet to get some wool.  EEEK!

So after looking up unlocking skeleton key cabinets on Google, I decided to try my hand at picking the lock.  After many failed attempts and curse words, I finally got it unlocked.  Lesson learned – Don’t trust old locks.  I with I could say I learned a new skill.  Hopefully I won’t need to pick any locks in my future because, frankly, I stink at it.

On a side note, I have received my essential oil bottles and I’m currently working on designing labels.  I’m waiting on my shipment of essential oils, and they should be here next week and I will be able to begin packaging, photographing and listing them in my shop.  YAY!  I’m so exited!

Sandra
Friday, August 22, 2014

Randomness


Lavender "Simple is Pretty Shop"
- Getting ready for school to start, I don’t know who is more nervous, me or the kids.

- Received my order for more organic wool and winding some new wool dryer balls for the shop.  My favorite color is my new indigo color, can’t wait to get them in the shop!  The dryer balls should be listed in the shop within the next few weeks.  Preview the indigo color on my Facebook page- now available for pre-order.

- Yesterday, I ordered new supplies to start my new line of essential oils for the shop.  Perfect for scenting wool dryer balls, adding to homemade cleaner recipes or using in diffusers.  I’ve been wanting to start this new line for years, finally taking the plunge!  Hoping to have the new line ready for the Christmas season.

- Making some new cleaners from Clean Mama’s book “The Organically Clean Home”- I can’t get enough of this book!  Easy recipes, with recognizable ingredients.  Just made the “Lavender and Orange Powdered Laundry Soap” and it is working GREAT!

- Sneaking in some more camping before school starts.  We are going to try out Geocaching for the first time.  Anyone try this before?

Sandra
Monday, July 7, 2014

Gift Wrap Kitchen Cabinet Update Part 2

In my last post, I used gift wrap to brighten up a kitchen cabinet by my microwave.

How to use gift wrap to update your kitchen cabinets

I decided to take this project to the next level and try a larger cabinet.  To check out how what you need to complete the project, click here.

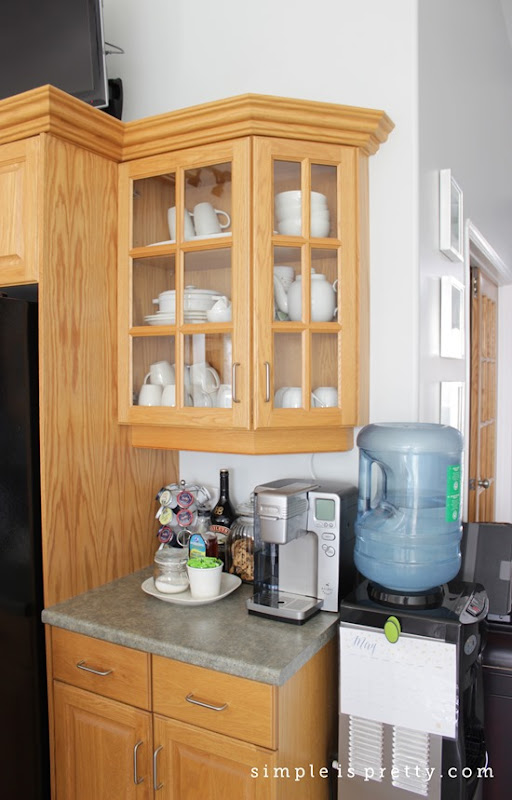
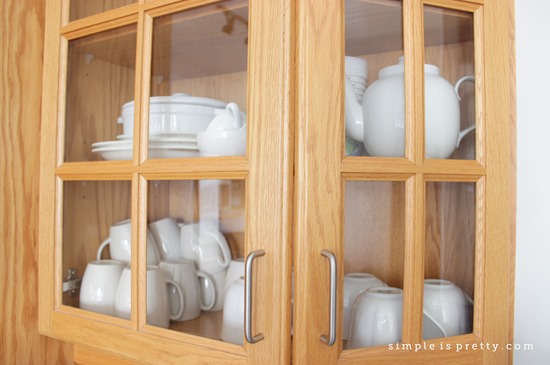
By Keurig before
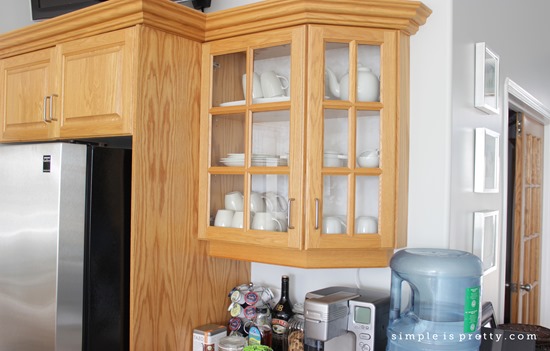
I decided to try the cabinet that is above our Cuisinart Keurig coffee maker.

By Keurig before close up

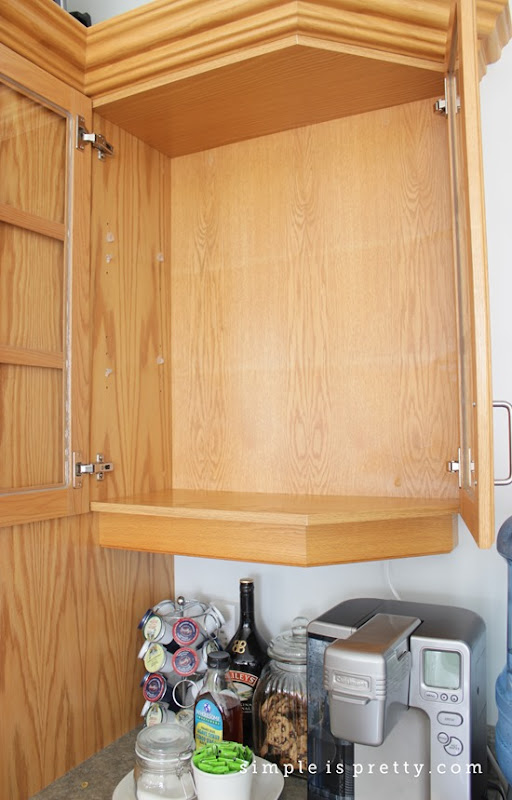
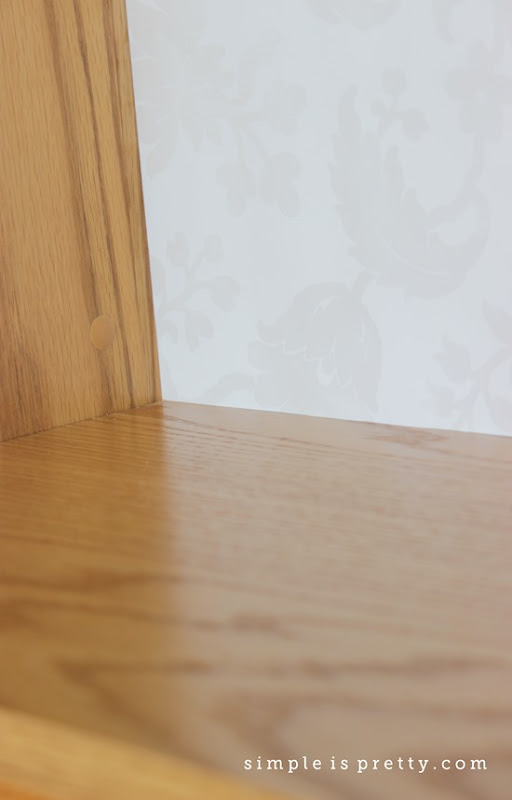
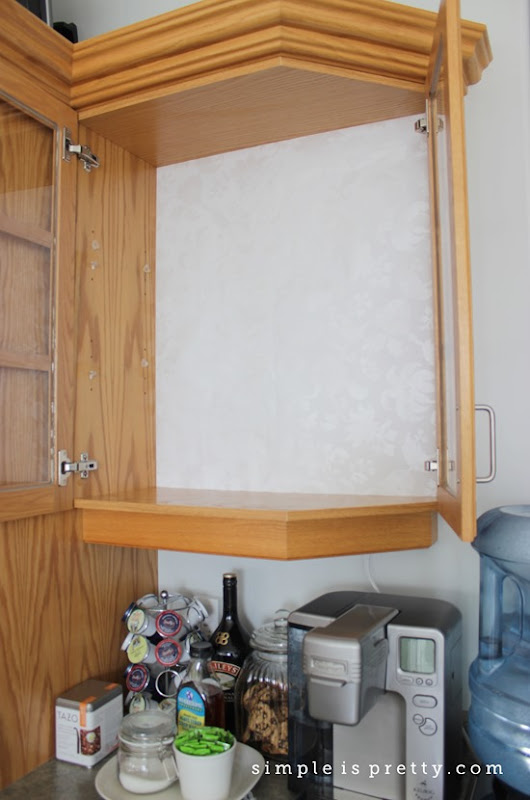
First, I took everything out, including the shelves.  I measured the gift wrap and cut it slightly larger than the back of the cabinet.

By Keurig before cabinet doors open
That way, I could just tuck it in again and not use glue or any adhesive to hold it in place.

By Keurig during cabinet doors open close up

By Keurig during cabinet doors open

By Keurig after #2

Update your kitchen cupboards with giftwrap
The paper adds a little personality to the cabinets now as well as brightens them.  Hopefully someday I’ll get my white kitchen cabinets, but until then this little change has helped change and brighten the space.

As Always,
Sandra
I shared this post at A Bowl Full of LemonsA Pretty Life in the SuburbsJoy in Our Home

Monday, June 30, 2014

Using Gift Wrap to Update Kitchen Cabinets

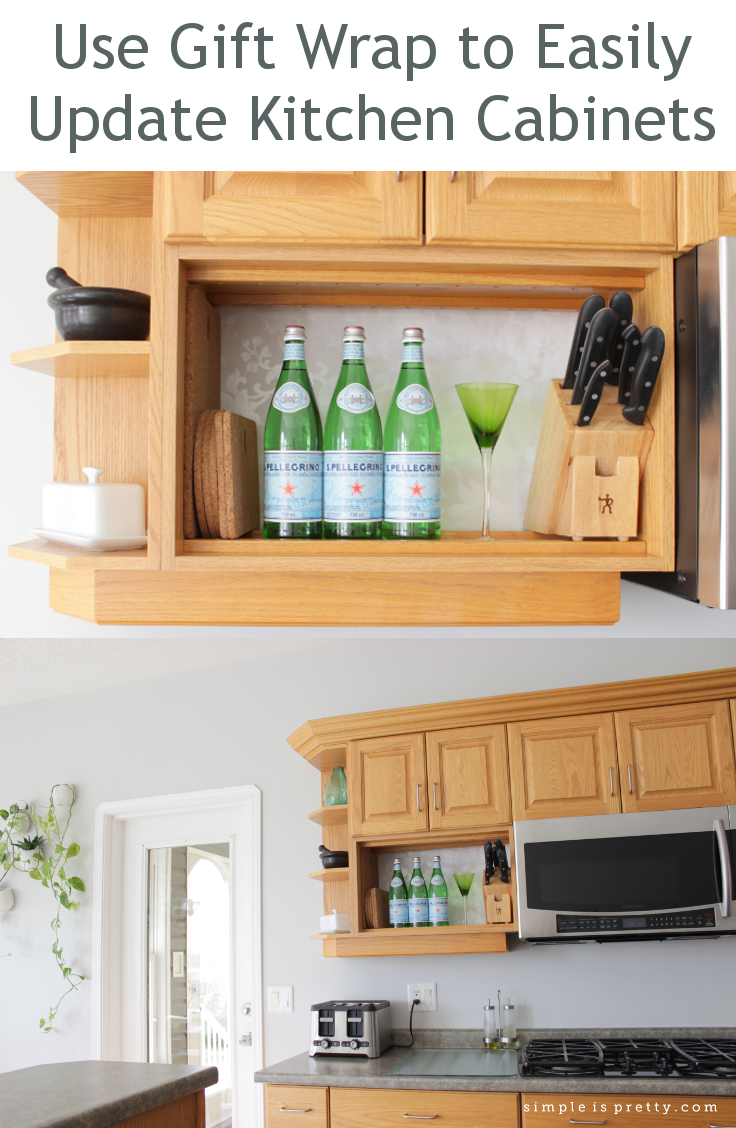
Of course, I want to paint my kitchen cabinets white.  Have I mentioned, I LOVE white!  I’ve wanted to paint the cabinets since we moved in a year ago.  But painting my cabinets would be either a huge time commitment on my part or I’d have to pay someone to paint them, which is just not in the budget quite yet.  So, I gave a couple cabinets a little brightening with white gift wrap.


Use gift wrap to update kitchen cabinets by www.simpleispretty.com

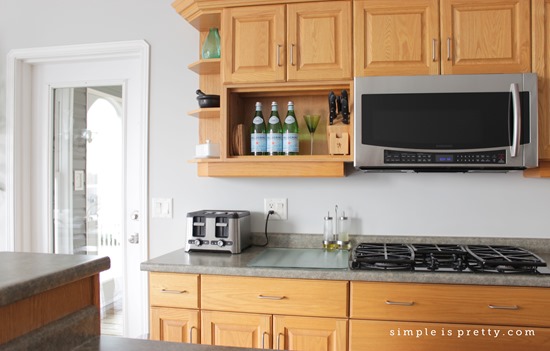
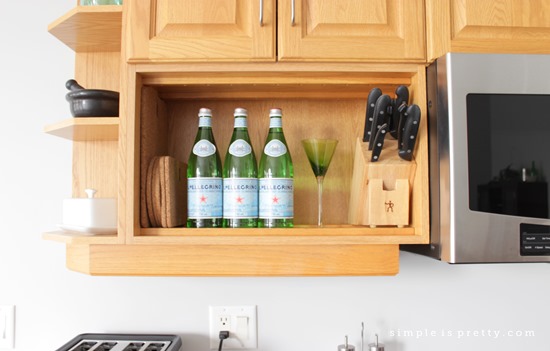
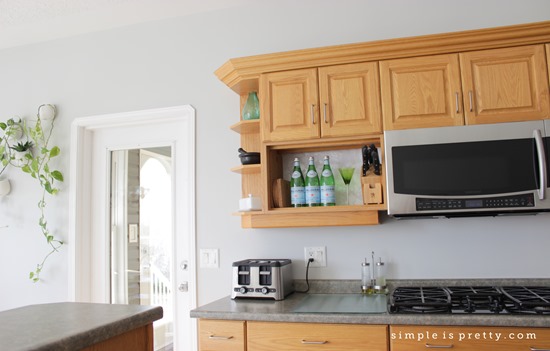
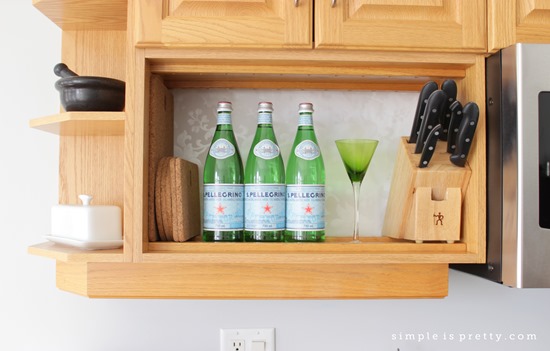
We have a small space beside our microwave that used to be a plate rack, which drove me crazy so I took out the dowels that would make the plates stand up.  This created a shelf I could place my knife block and a few other items.

By microwave before

By microwave before close up

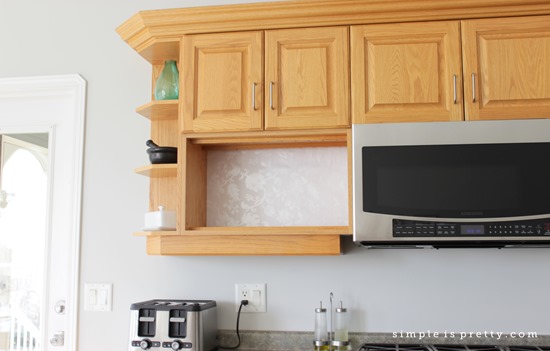
I was not happy with this space, so I decided to try livening it up with some white patterned gift wrap.

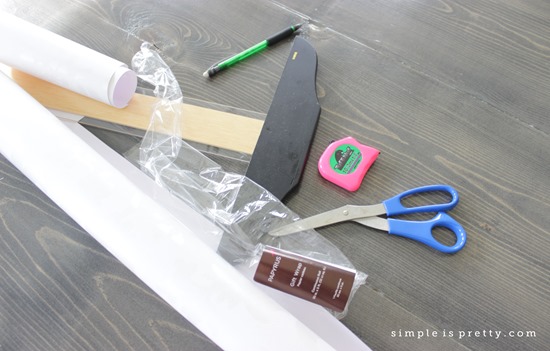
Supplies for Gift Wrap at Back of Cupboards
I cut the gift wrap slightly larger than the back of the cupboard.  After I cut the size I needed, I steamed the piece of paper with a towel over it using my iron.   This way, I could protect the paper and also get some of the curl out of the gift wrap.

By microwave, putting gift wrap in place #2

By microwave, putting gift wrap in place
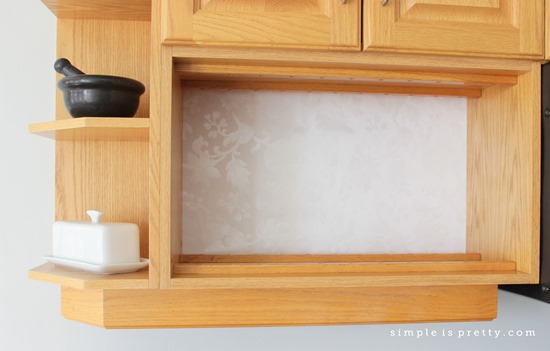
At the back of the cabinet, there was a small space I could tuck the gift wrap in all around to keep it from falling down, so I didn’t use glue or any adhesive.  Which is great, in case I want to change it or remove it later.

By microwave after

By microwave after close up
Much better and brighter.  I also tried gift wrap at the back of one more cabinet, I’ll share that project in my next post.

As Always,
Sandra
I shared this post at A Bowl Full of Lemons, Satori Design for Living, Joy in Our Home

Friday, June 20, 2014

Cleaning with Homemade Cleaners (Take 1)

I’ve cleaned my home for many years using both handmade and store bought cleaners.  When purchasing store bought cleaners I’ve tried to stay to more natural or eco-friendly cleaners (eg. Method).  Not until recently, have I felt ready to jump in and make a switch that will hopefully eliminate my need for store bought cleaners permanently.

One area in my house I have always used store bought chemical cleaner is… the dreaded cleaning of the toilets.  I somehow thought if I used a whole bunch of chemicals in the form of a blue liquid, that this was the only way to “safely clean” my toilets.  I had a mental block preventing me from seeing another solution.  After all, I knew there had to be another way.  Otherwise how would my grandmother have cleaned hers??  I'm pretty sure she was not investing in blue liquid.  But I needed to use a recipe from someone I trust.

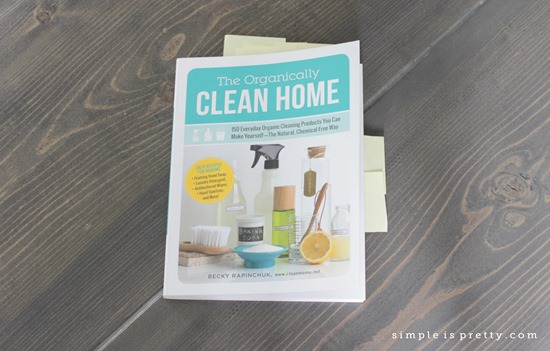
I recently purchased the book “The Organically Clean Home” by Becky Rapinchuk (Clean Mama).  She has changed the way I think of “clean”.  Using her book, I’m making some changes and switching to homemade, natural, chemical free cleaners throughout my home.

The Organically Clean Home (by Becky Rapinchuk) - Cleanmama.net via simpleispretty.com
Via Cleanmama.net

For years, I have cleaned my sinks and showers with pure 100% white vinegar.  Not a nice smell I know, but I knew it worked.  I knew that vinegar has a ton of germ killing properties.  I knew that it worked well in our old house to clean up the effects of hard well water.  Heck, “vinegar” has its own label here on my blog, I use it so much.  Sometimes vinegar was the only thing that would work to clean my sinks and showers at the old house, no store bought cleaner could compare.  But I could not get past cleaning toilets naturally and without a blue liquid.  With Becky’s book, I hope to conquer this fear.

Last night, I made 2 recipes from her book.  I wanted to start with recipes I knew I would use often and would make a big difference in our house.  One recipe is for my bathrooms – Lavender and Lemon Bathroom Disinfecting Spray.   And one is for my kitchen – Tea Tree and Orange Disinfecting Cleaner.  I’m not new to Tea Tree essential oil, and I know it has MANY benefits.  But, I’m most excited that I can now replace my 100% vinegar solutions.  My nose will thank me I’m sure.  And now I won’t be worried about using my cleaners before company arrives because I was afraid of the vinegar odour.  These cleaners smell wonderful!

My first 2 cleaners from The Organically Clean Home Book
I gave the new cleaners a test run, and I am very impressed with how easy they were to throw together.  I have all the ingredients on hand.  I can now replace my homemade kitchen cleaner and my 100% vinegar bathroom cleaner.  I’m so HAPPY!

I’m excited to try more recipes from her book.  I have sticky notes all over the pages of her book, marking recipes I want to try next.  The best part is most of the recipes use ingredients I already have on hand.

The Organically Clean Home, Post its marking recipes to make later
This week, I’m going to conquer my bathroom toilet cleaning fear.  I’m giving her very simple, chemical free recipe a try.  Not only can I pronounce all the ingredients and I know what they are.  Big step.  I will let you know how I make out!

As Always,
Sandra
By the way, I’m not paid for this post, all opinions are my own.  I just love her book and want to share how it is changing my cleaning routine :)

Wednesday, June 11, 2014

Mice in My Camper Trailer!

Ok, I was going to write about something else today, but since this seems to be eating up all my time, I thought I’d vent about what is going on.

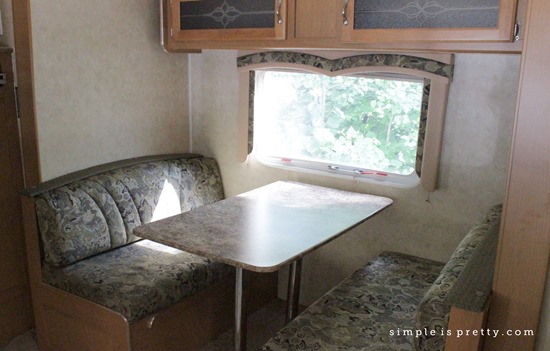
Camper Table and Benches before Mice in Camper
It’s true.  Over the winter, we got mice in our camper trailer.  My husband set traps in the camper before we closed it up in the fall last year.  We also stuck “Bounce” sheets everywhere (something we had heard that deterred mice from coming in a camper).  During the winter, my husband caught 2 mice in the traps he had set.  Notice I say “my husband”.  I don’t know what it is about mice but have a huge issue with removing dead ones from traps.  I would sooner throw the whole trap out and set up a brand new trap to catch more rather than reuse a trap.  So I will gladly leave this mouse removal job for my husband.

I’m going to warn you, the next few paragraphs might be a bit gruesome.

When I was a university student, I lived in Halifax, NS.  Side note -Halifax is such a beautiful place, I recommend visiting, the views and history are amazing.  I hope to go back some day.

When school started, I lived in a really old building by the water which was used as overflow dorms for the university I was attending.  You guessed it, perfect place for mice.  The management would use live traps (the sticky paper ones), trying to be humane, and in the middle of the night you would hear a mouse screaming and trying to gnaw off its own leg to free itself.

After the Christmas break, I had enough of dorm life and got the brilliant idea to move out and share an apartment with a girl friend I had met in dorms.  We didn’t do much apartment hunting, we basically took the first apartment that fit our budget and was in the right area for us to get to school.  Our one bedroom, ground level apartment was tiny.  I was lucky enough to take the bedroom (if you could call it that).  I’m guessing it was 8 by 10 feet with a view of the garbage dumpster about 2 feet from the window.  I bought an air mattress and slept on the floor.  She bought a futon and slept in the living room when she was around.  She had a boyfriend and would spend most nights at his place.  So most of the time, it was just me in the tiny apartment.

Not long after we moved in, we noticed the mice.  The worst part was at night and hearing them running in the walls.  Looking back, I wonder how I managed to get any sleep.  But if you are faced with a situation you try to make the best of it, and/or block it out.  I bought steel wool and stuffed it in between the carpet and the baseboards and any holes or crevices I could find in the apartment.  I kept reminding myself, only a few more months to go and I would be out of this mice infested apartment.

Many years later, the first house my husband and I bought together, we had one mouse get in.  Luckily, we managed to catch it quickly.  I’m guessing it came in while we are unloading/loading our vehicle for a trip.  I think my husband was away at the time it got caught in the trap, so I had to deal with the dead mouse.  As far as I remember, I threw put on disposable rubber gloves, grabbed a stick from outside and hooked the mouse trap on the stick and threw the mouse (trap and all) into the garbage.  I think that is what happened, I have a great memory for blocking out yucky and bad parts of my life.

So when my husband told me that mice got into the camper this winter, I knew it was going to be a big job to get it cleaned out again.  Mice make a mess quickly.  Luckily, it was only 2 mice and they did not have time to make a nest and have babies before they were caught.  Although, they were just starting to build a nest as some of the blankets had been gnawed and pulled apart.

We took everything out of the camper.  My husband used the shop vac to vacuum up all the droppings. I washed all the blankets, towels and all things fabric.  Washed the dishes, pots and pans.  If it couldn’t be washed it got thrown out.  My husband washed everything down.

So this is where we are now.  Such a waste of time!!  Before I move all the clean items back in, I will give it a good vacuuming.  Yesterday, I bought a carpet cleaner to wash all the carpets, couch and benches.  After that is done, I’m going to give all the surfaces a really good wash and make sure no more mice are in there!

Camper Kitchen before Mice in Camper
Unfortunately, we still don’t know where they came into the camper, so we’ll have to put steel wool and spray foam in every crevice we think they many have came in. Oi!

Have you ever had to deal with mice?

As Always,
Sandra

Monday, May 12, 2014

Homemade Goo Gone

Over the summer, I made my own homemade goo gone.  I used to buy goo gone from the store until I read the back of the bottle and all the warnings and ingredients, YIKES!


Mostly, I use goo gone in my house to remove unwanted stickers from items including plates, cups, jars, spray bottles and many other items.

Don't have time to make your own goo gone and want a natural solution?  You can now purchase my natural sticker and goo remover in my Etsy shop --> Click here!  You can even purchase my lavender scented version here!


There are many versions on the internet to make your own goo gone.  Basically, you will need an oil to soak into the sticker and a gentle abrasive to work at removing the sticker.  Here is my version, which is very simple:

Ingredients:

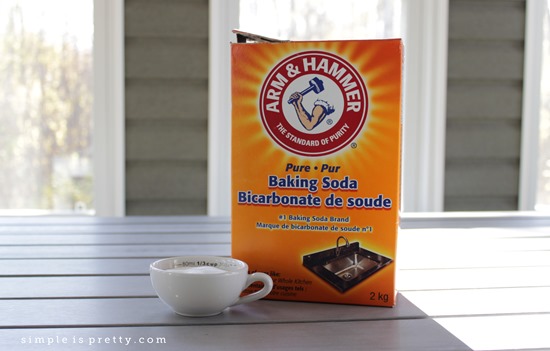
Baking Soda in cup
1/3 cup baking soda

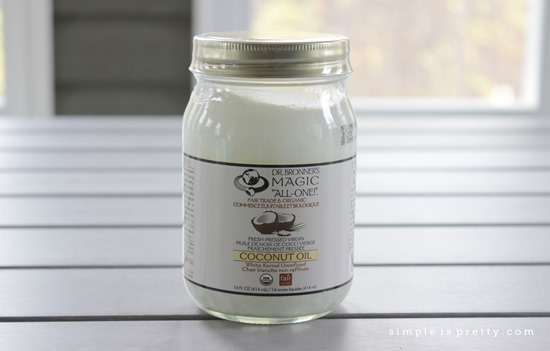
Dr. Bronner's Coconut Oil
1/3 cup coconut oil (I used Dr. Bronner’s)

Lavender Essential Oil 10ml - Simple is Pretty Etsy Shop

Essential oil (optional) - Choose whatever scent you enjoy.  Check out my Etsy shop for 100% Pure Essential oils to scent your goo gone naturally.

Jar to put homemade goo gone in
A small jar (for storing your new goo gone)


Method:

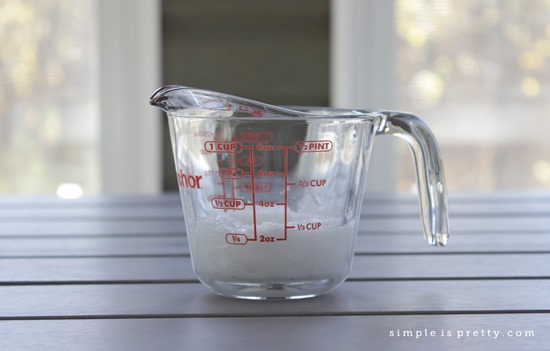
1. Measure about 1/3 cup of coconut oil into a glass measuring cup.  Put it in the microwave for a few seconds (time will vary depending on the microwave used).  You will want the coconut oil to become a liquid, but not hot.

measuring cup with coconut oil
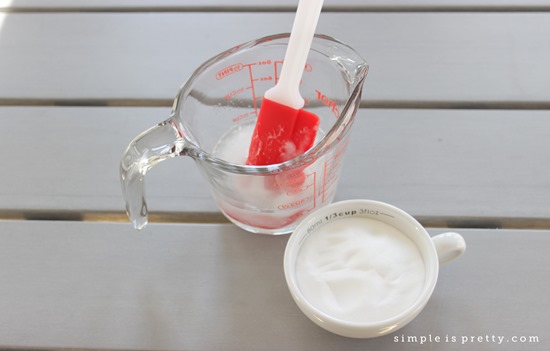
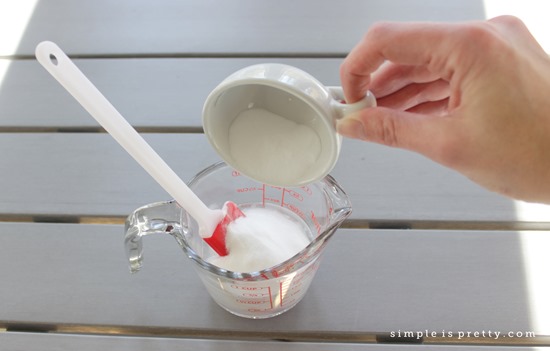
2. Add in 1/3 cup of baking soda to the coconut oil.  Stir till combined and all the lumps are gone.  Add a few drops of essential oil if you desire.  I like the smell of the coconut oil, so I did not use essential oil to scent my goo gone.

Coconut oil and baking soda

Pouring baking soda in coconut oil
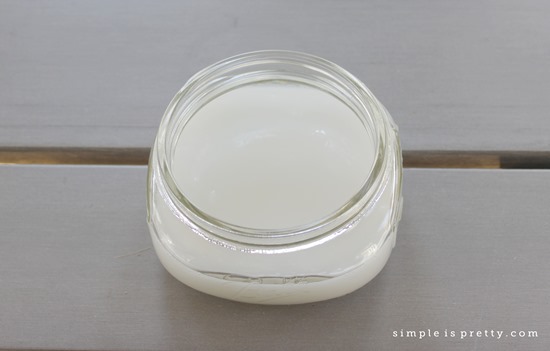
3. Pour the combined mixture into a jar to store.  Let it cool to room temperature and it will become a paste.

Homemade Goo Gone
4. Once the goo gone becomes a paste, it will be easy to spread on stickers or sticker residue to remove them.  I use a paper towel to grab some from the jar and spread where I need it.  I wait a few minutes for the oil to soak in and then you will need to rub the mixture in with the paper towel to remove the sticker.

Before:

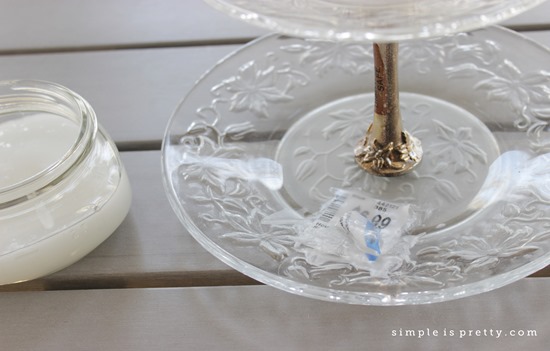
Serving tray with sticker on it, need to remove
Homemade Goo Gone Removing the Sticker:

Serving tray with homemade goo gone working
After:

Serving tray with sticker removed
I find it works better if most of the paper from the sticker has been removed, but it will also work if it is not fully removed.  I no longer use the store bought version of goo gone.  My homemade version works just as well for what I use it for, which is mostly stickers.  Plus, I love how I can leave it in a drawer in my kitchen and feel safe knowing harsh chemicals are not involved in this recipe.  Something I could not do with the store bought version.

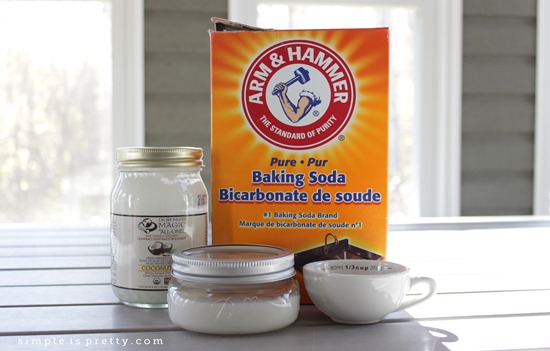
All ingredients for Homemade Goo Gone

Sandra